How To Send Product Events to Orbit
Connect product-related activities to your Orbit workspace and get the full picture of your product users and community members.

Guillaume Millot
May 17, 2021
When your community is built around a product, you certainly know how important it is to understand product usage alongside community engagement. As an Orbit user, you may also wonder if Orbit can help you.
Indeed, getting a fuller picture of the product user & community member requires a way to send product events such as a user signing up, inviting other users to their account, upgrading their plan, and other key user milestones to your Orbit workspace.
In the conversations I had with users, this question came up a lot, and when it didn’t, it was usually because our users didn’t know it was possible!
In this blog post, I’ll walk through how you can create workflows to connect product-related activities to your Orbit workspace and illustrate the kind of insights you get by correlating community data with product data.
The objective is to encourage you to think about your own use case for sending product events to Orbit and creating workflows. Let’s get started!
Prerequisites
1) Know your product analytics stack
Since product analytics tools collect and manage product events, you’ll need to get familiar with your product analytics stack or get closer to the team that manages it.
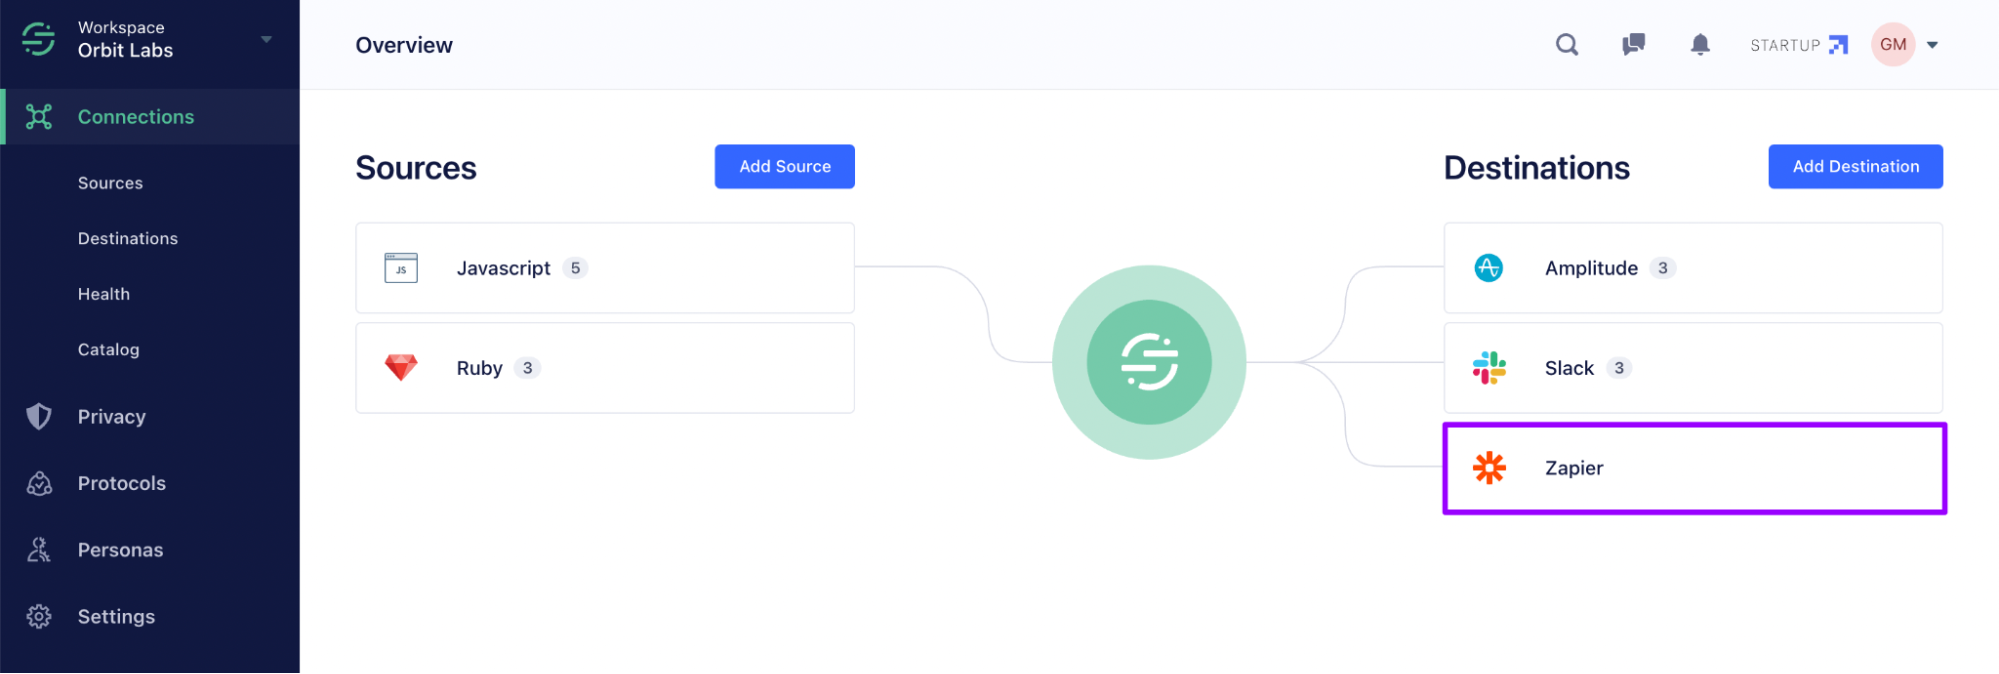
For example, at Orbit, we use Segment as a hub to collect events occurring on all our properties, mainly the Orbit website and the Orbit app, and Amplitude as our product analytics tool, as illustrated on this Segment diagram:

On the diagram, the Orbit website and Orbit app are called "Sources". The product event data we're interested in come from the Orbit app.
Segment sends this data to "Destinations". Amplitude is one for example.
2) Decide which product events to send to Orbit
Then, you’ll need to identify some key events to send to Orbit. Product analytics stacks commonly track tons of product events, and you don’t want to send them all to Orbit.
In general, creating an account, inviting a user, and providing feedback are the right events to send in, because they’re the most useful to see in the timeline and segment your product users based on their community potential:
- Product sign-up/activation is a prerequisite to adding value in a product community.
- Inviting another user represents the willingness to share and connect with others around the product.
- Sending feedback shows willingness to help improve and contribute.
Finally, tracking product sign-up makes attribution to community activity easier, as I’ll illustrate in this blog post.
3) Choose a platform for creating your workflows
You now know how your product events are collected and which ones are useful, but you don’t know how to send them to Orbit yet:

Indeed, Orbit doesn’t currently offer built-in integrations with Customer Data Platforms such as Segment or Product Analytics tools such as Amplitude, so you can either choose to build a custom integration or create workflows using a no-code platform.
In the next section, I’ll show you how to create workflows in Zapier, called “Zaps”, and trigger them using Segment. Let’s get started!
Creating the workflows
Step 1: Add the first event
1) In Segment, add Zapier as a new Destination:
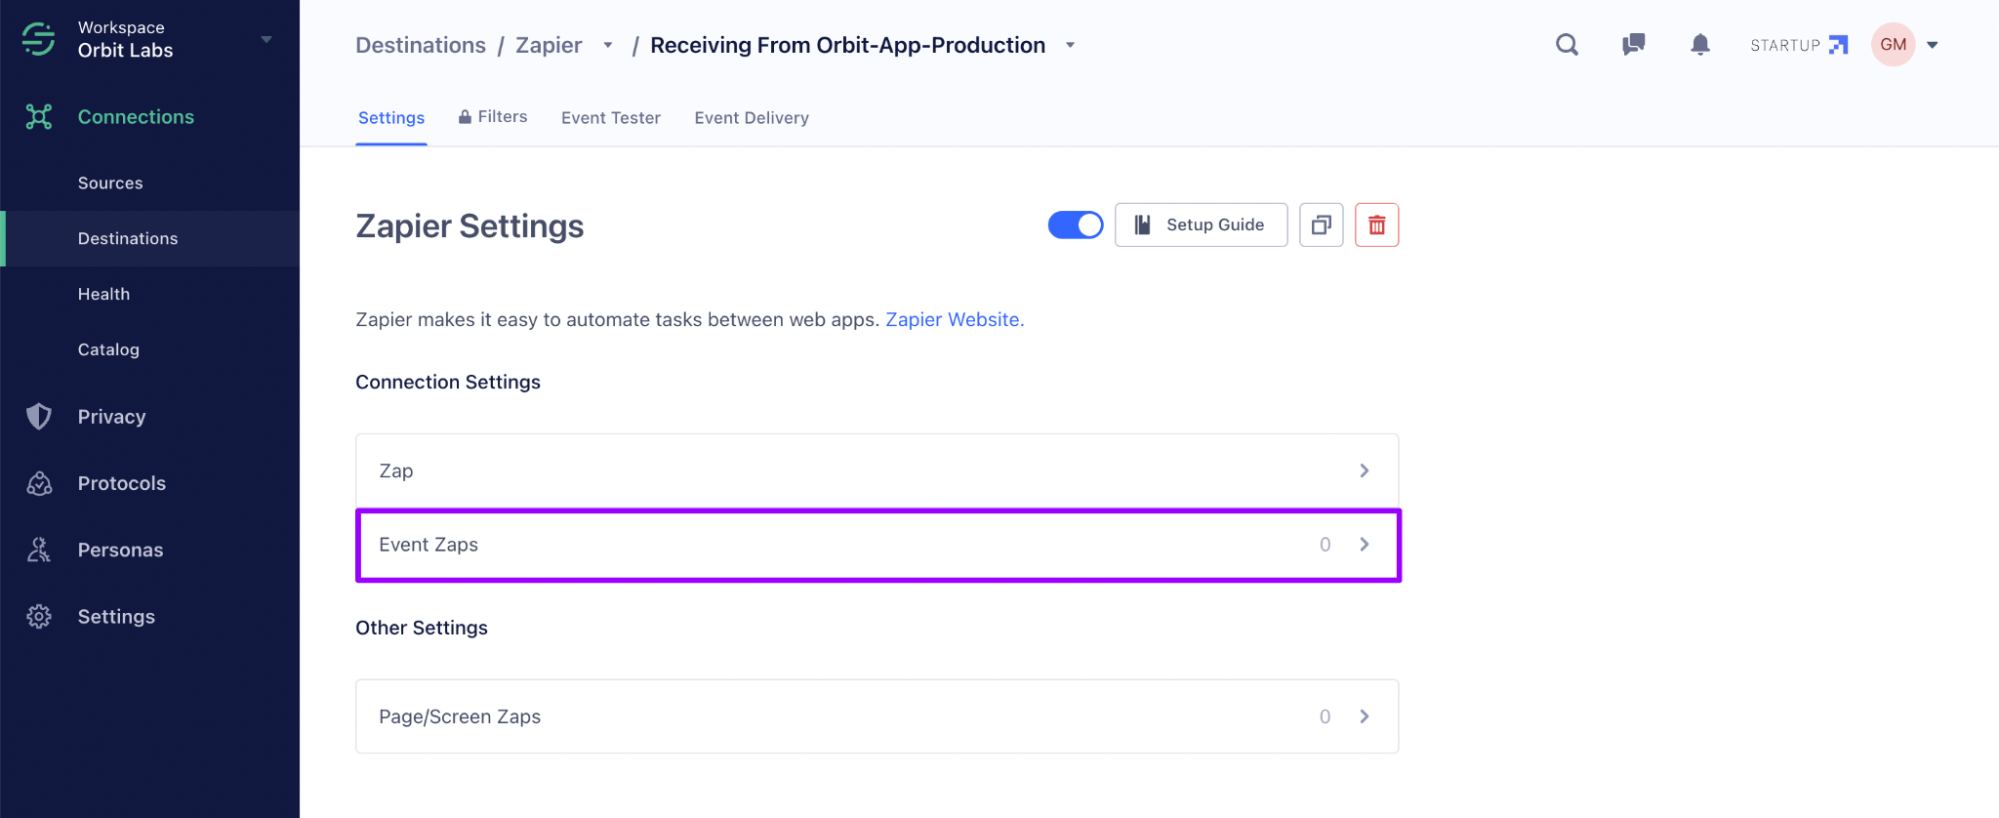
2) Click on “Event Zaps” on the Zapier Settings page to create a trigger for your first product event:
3) Enter the Segment name of this event:
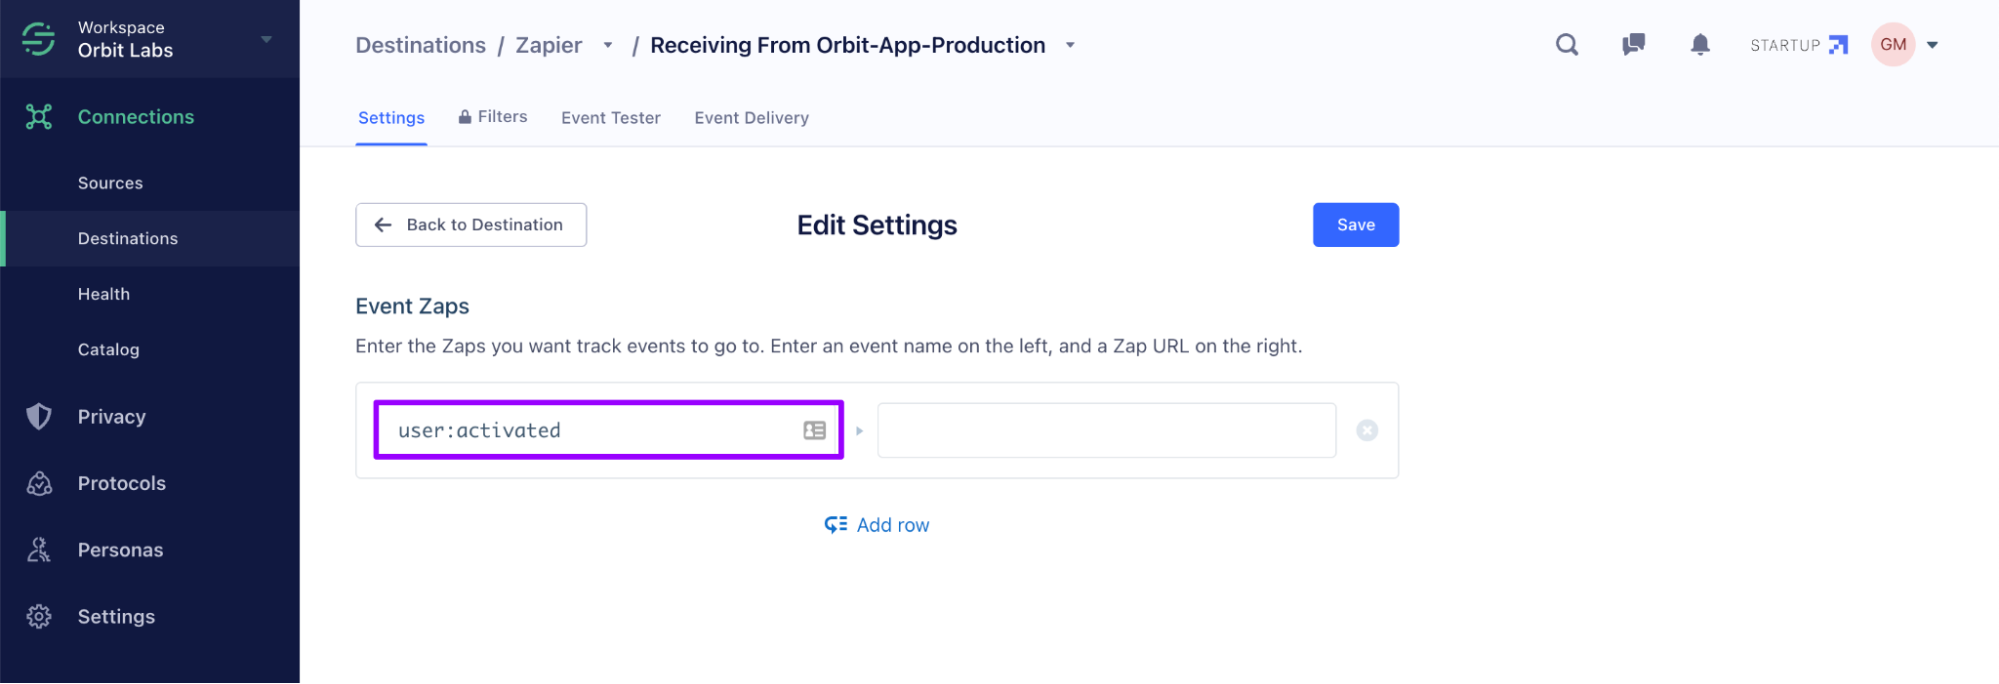
Every time this event occurs, Segment will trigger the Zapier workflow located at the URL in the right column. You haven’t created a Zapier workflow yet, so leave the right column blank and the Segment page open for now, to fill it in later on.
Step 2: Create a workflow for your first event
You can create a Zapier workflow in two ways: either from scratch or by re-using a template/shared workflow. Let’s use the latest solution as is the quickest.
1) Open this shared template and click on “Try this Zap”:
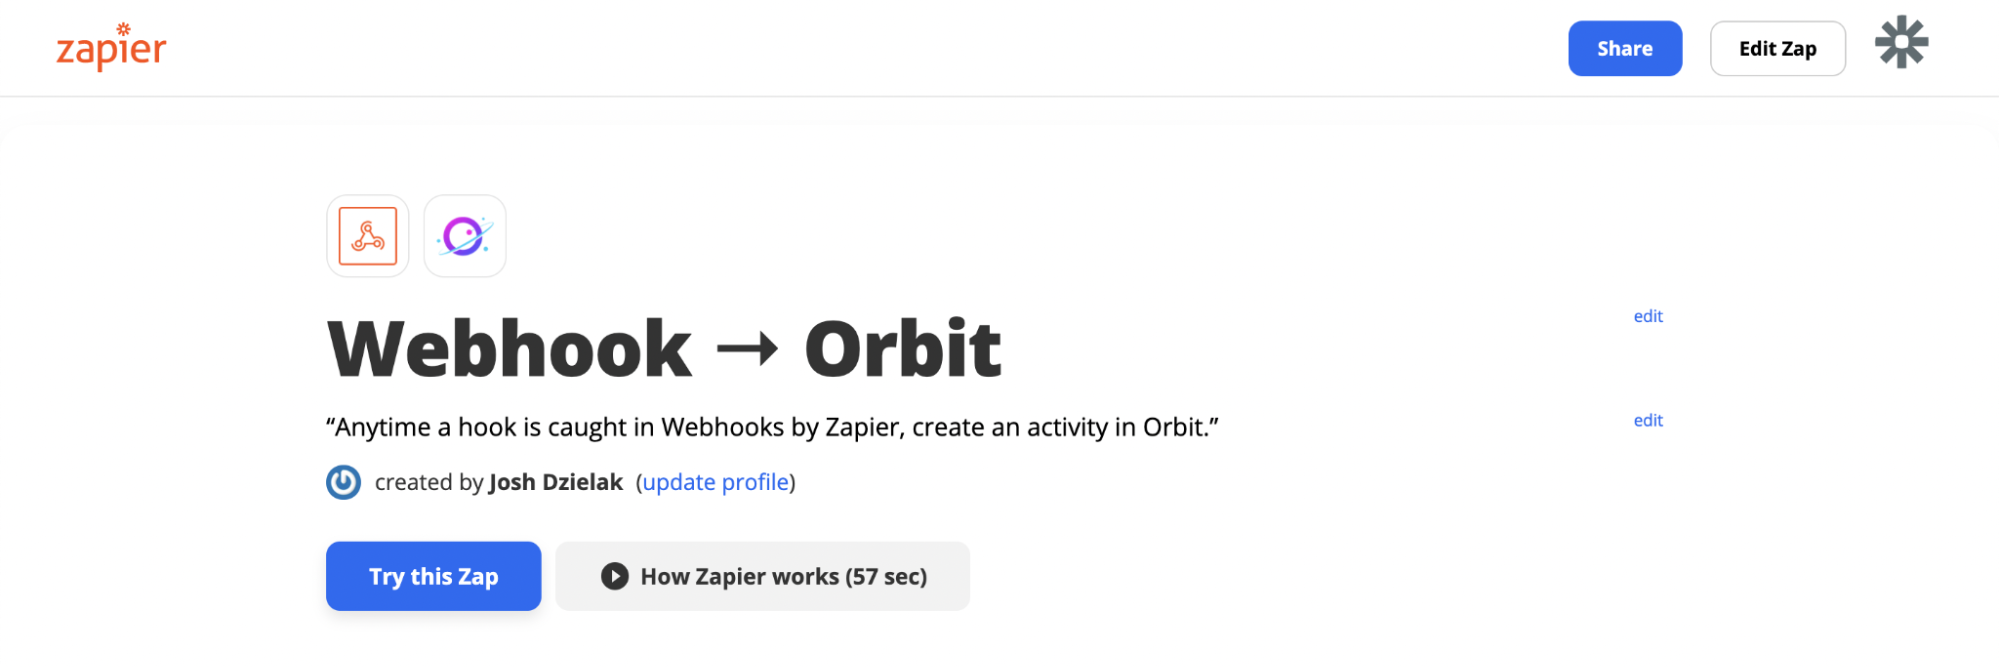
2) If not logged in, you will be prompted to log in to Zapier.
Then, comes the fun part. This workflow works in 2 consecutive steps: a Trigger step and an Action step. Let’s start with the Trigger step.
3) The Zapier workflow should get triggered when it receives on its URL the event you just added in Segment. This process is implemented through webhooks and a special Zapier app called Webhooks by Zapier.
Find the workflow URL in the “Test trigger” pane:
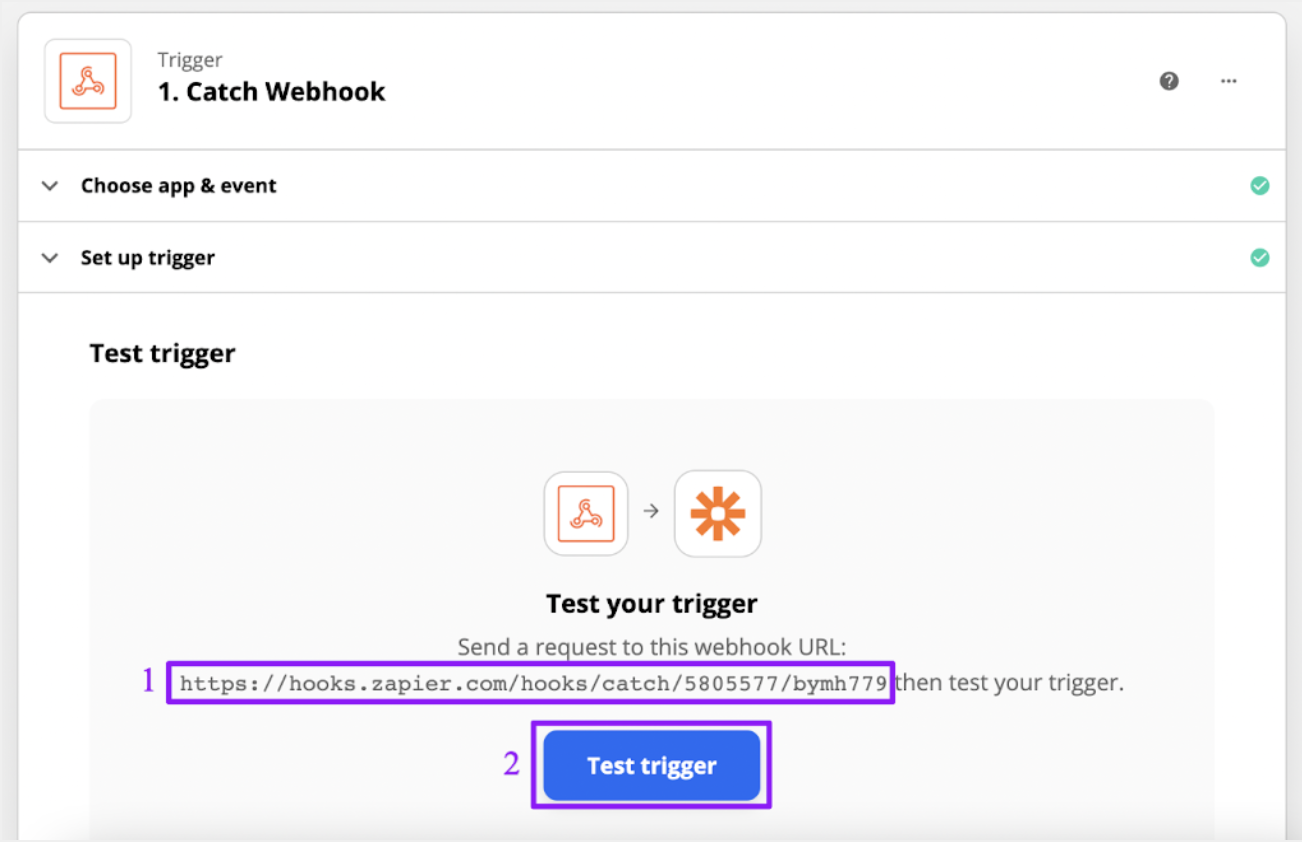
4) Copy and paste it in the right column next to the event name in Segment.
5) Trigger a fake product event, then click on “Test trigger” in Zapier. That will load the data of the event you just triggered:
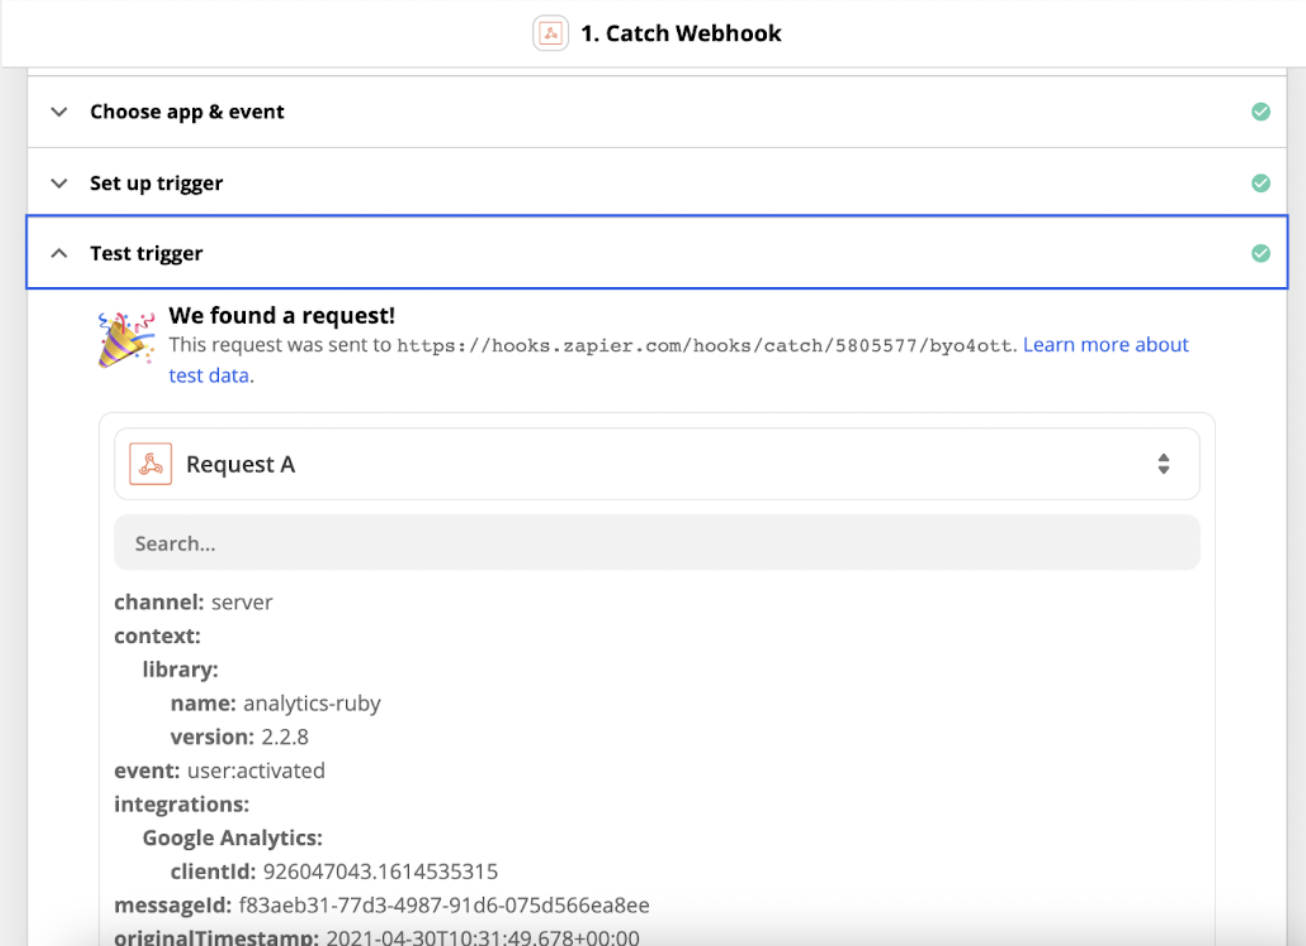
This data will be used to configure the Action step.
6) Scroll down to the Action step called “Create Activity in Orbit”, and click on it:

7) The first time you use this Action, you’ll be prompted to sign in to Orbit and to enter the URL slug of your workspace name and your API key:
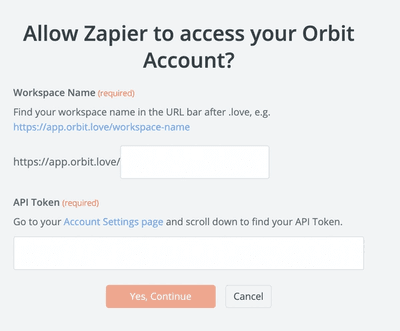
8) This Action step creates an activity in Orbit using the user’s email address collected through Segment and available in the event data. If a member tied to this email address already exists in Orbit, it ties the new activity to this member. Otherwise, it creates a new member, then ties the new activity to this new member.
Take a look at the activity attributes that are configured for this workflow:
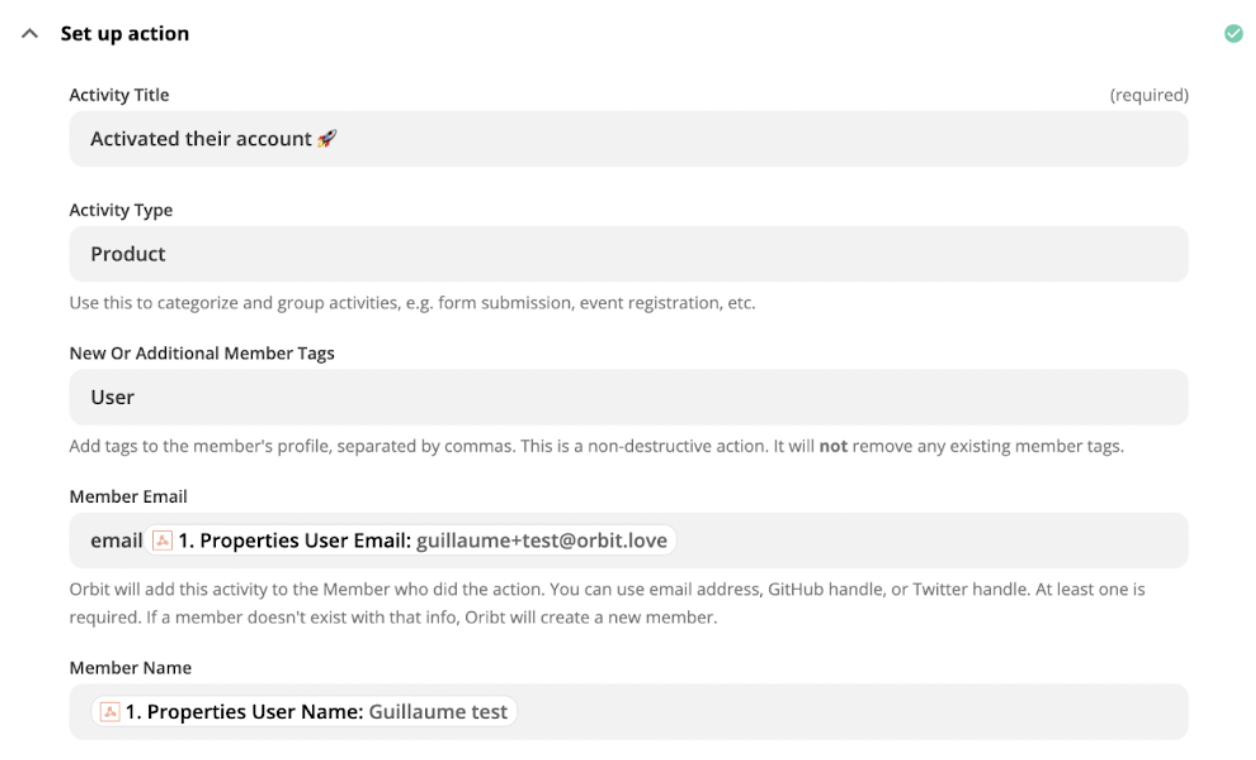
This workflow adds the tag “User” to every community member who activates an Orbit account.
Configure the attributes according to your product event. Hurray, your first workflow is complete! 👏
Step 3: Repeat the process for the other events
Once you’ve created your first workflow, add the other events in Segment and create the corresponding workflows.
Here’s what your final workflow setup may look like in Zapier:
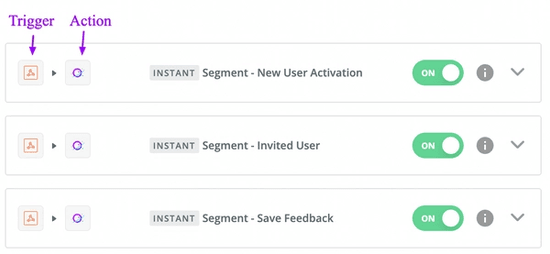
Step 4: Verify that Orbit received your product events
Once your product events are flowing into Orbit, they should appear as custom activities in the activity feed of your workspace. In the below extract, we can see that a user created an Orbit account, then invited another user, so it's working well. 👍

In the next section, I’ll show you some of the insights you get by correlating your product data with your community data.
Getting insights from your product and community data in Orbit
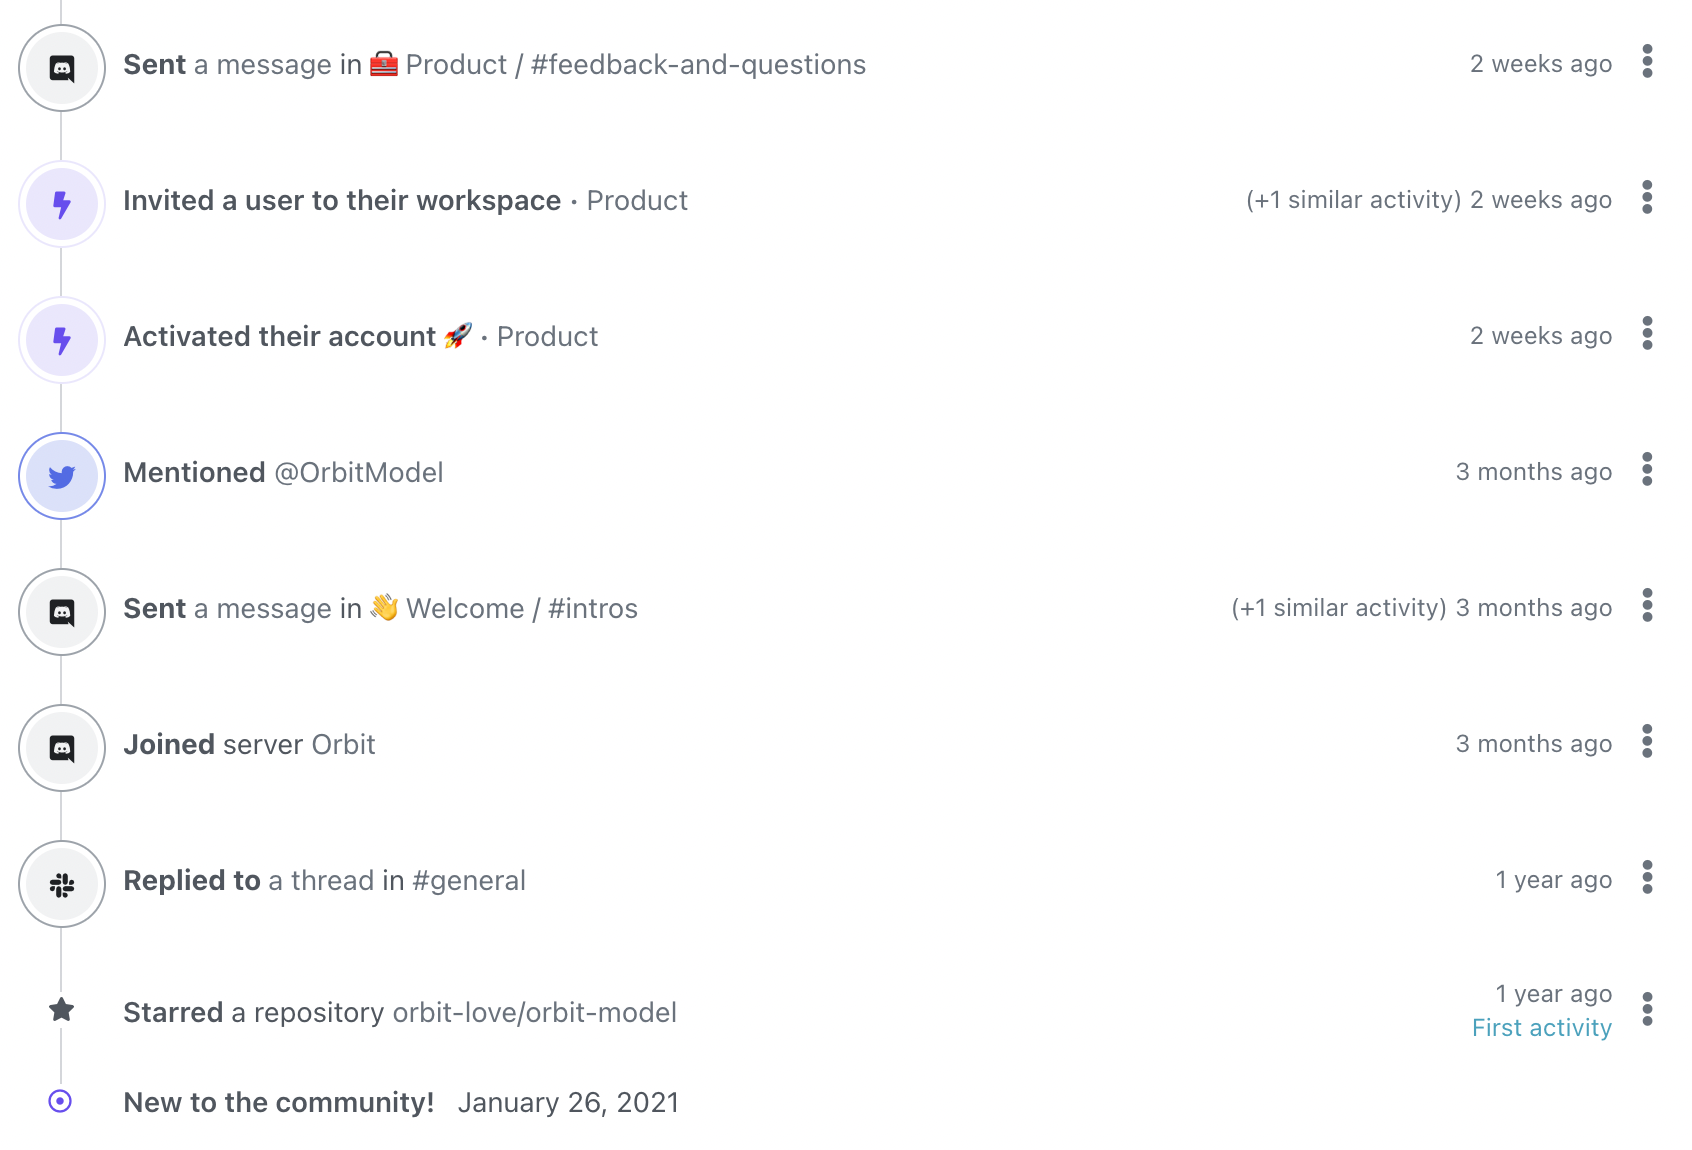
1) Visualize the journey of your product users in the community
You can start by visualizing some of your users’ journeys in the community. Perhaps, you’ll already notice some patterns.
The following journeys are taken from the Orbit workspace going from simple to more complex:
Example 1: Twitter → Product Sign-up → Discord

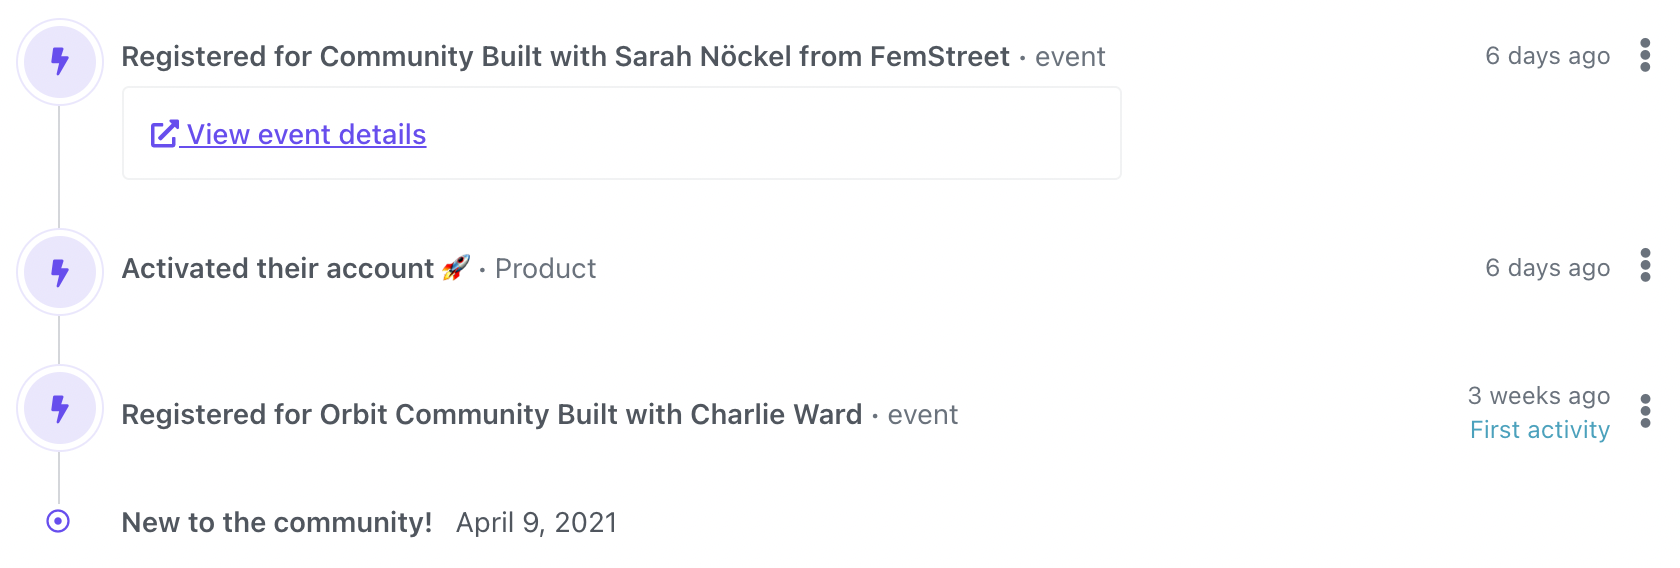
Example 2: Community Event → Product Sign-up → Community Event
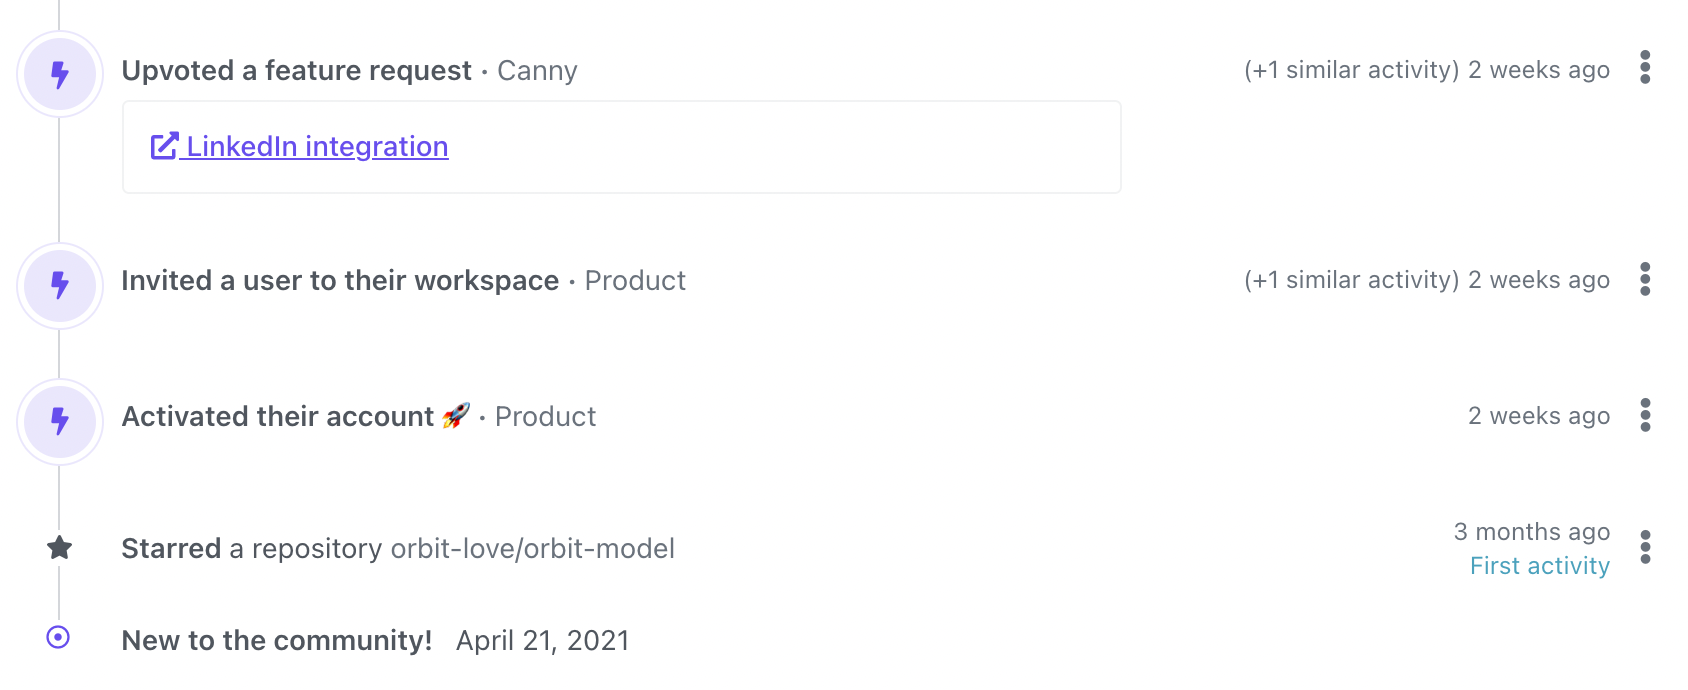
Example 3: GitHub → Product Sign-up → Shared Feedback
Example 4: GitHub → Slack → Discord → Twitter → Product Sign-up
2) Monitor the number of users who are active members of the community
Next, you can visit the Reports section to open some interesting reports.
For example, the following chart shows the evolution of the number of Orbit users who are active on our Discord server. The number has been steadily growing, so all good. 👍
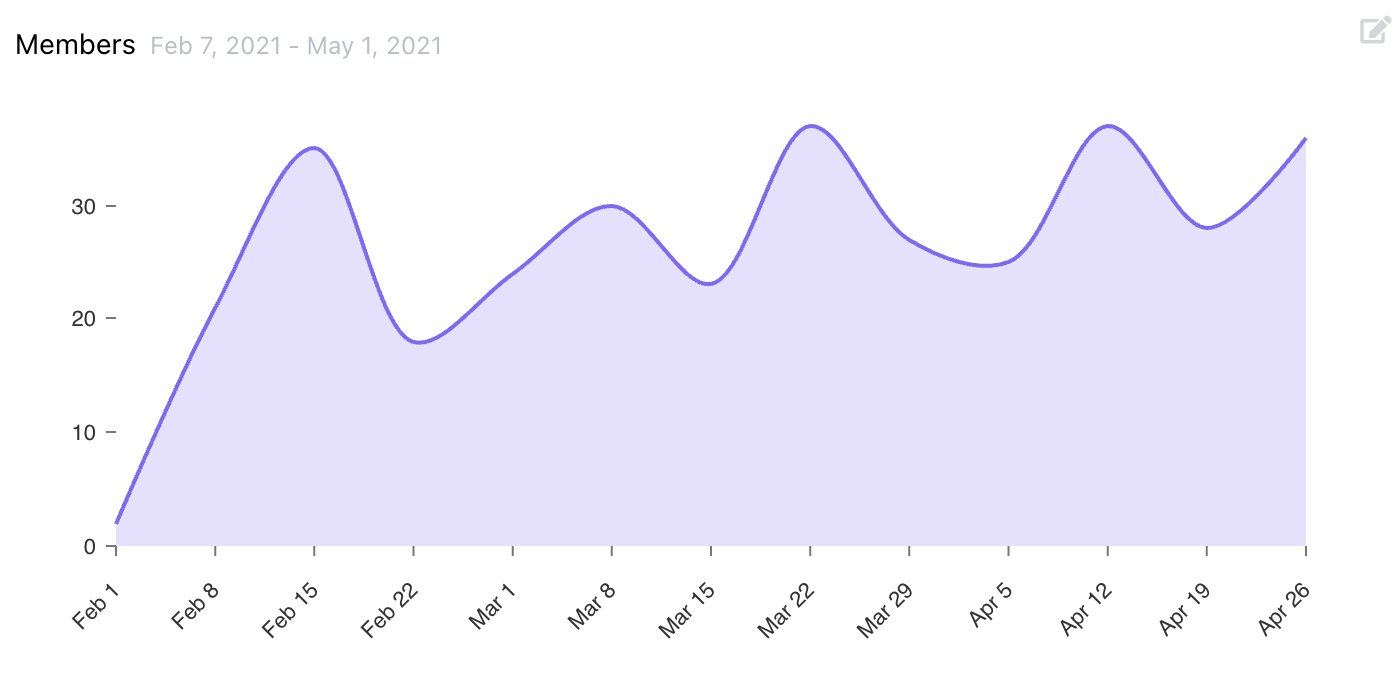
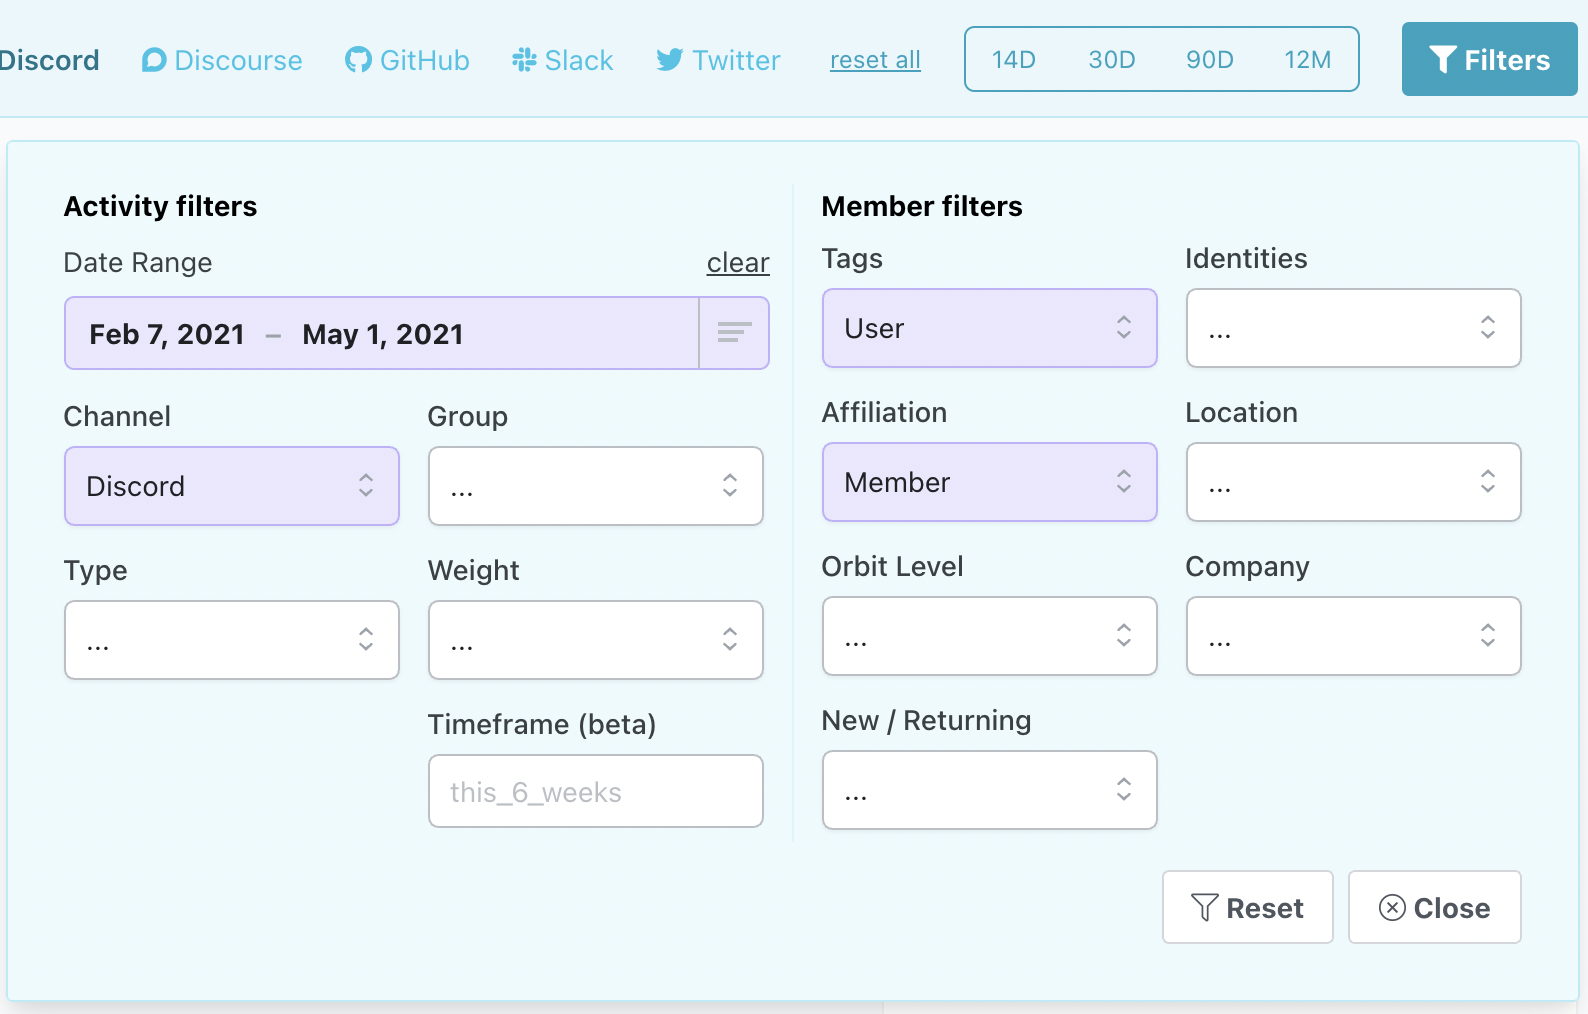
To pull this chart, head over to the Reports section. Then, in Pulse reports, click on the Filters widget, and select the tag “User” and channel you’re interested in:
3) See if your new users were already active in the community
Next, you may want to know if your product users were already engaged in the community before signing up/activating their account.
This experimental chart shows the top community channels, where Orbit users were most active before activating their account:
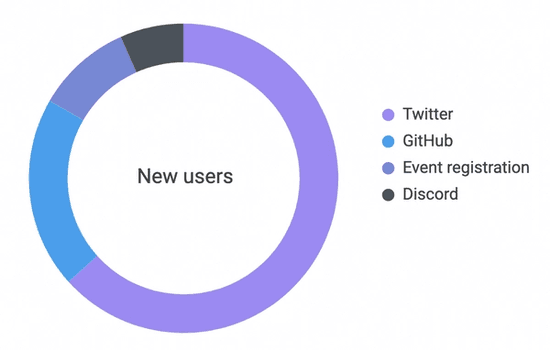
Twitter is the most popular channel for new Orbit users.
Other communities may convey a very different story: let's take for instance communities around commercial open-source software. GitHub or support forum/chat platforms might be their most popular channels!
⚠️ To draw the right conclusion, you should ensure that all the profiles are merged. Otherwise, your product users may incorrectly appear as having no previous community activity before signing up.
To pull this chart:
- Head over to your Workspace Settings page, click on Export and Download a CSV of activities.
- After uploading the CSV to a spreadsheet, filter out non-users by only keeping members with the “User” tag (see the previous section).
- Order the activities by member, then by decreasing activity timestamp.
- Plot all the first activities by community channel.
4) Know your users’ preferred community channels
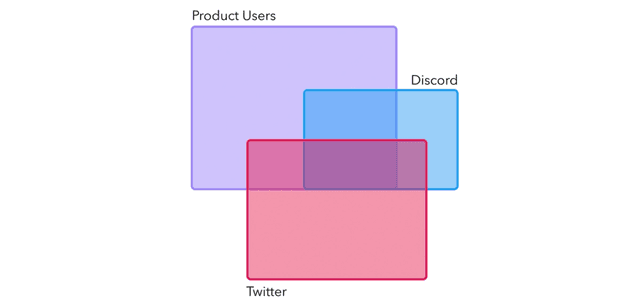
Finally, you can try to create a Venn diagram to study the overlap between your community channels. Here’s the one for Orbit:
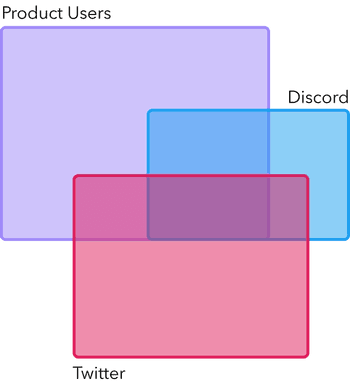
Without surprise, the majority of the Orbit community members who are active on Discord are also Orbit users. Today, Discord indeed serves as our main channel to provide product support, so many Orbit users join the Discord to share feedback or seek advice.
The non-overlapping areas show that there are still many members who aren’t Orbit users, whether they are active on Discord or Twitter. Perhaps, we haven’t merged in our Orbit workspace their Twitter or Discord profiles with their user profiles. Or perhaps, not all of them need to use Orbit. Something to dig into for sure!
Creating this chart is a little more involved, so feel free to chat with me or look for advice in our Discord community.
Your turn!
I hope this blog post was insightful and gave you some good reasons to correlate your product data with your community data in Orbit.
As an additional resource, you may check out our documentation, which explains in more detail how to get started with our Zapier integration.
Not using Zapier or Segment?
All you need is a product analytics tool, such as Amplitude or Heap.io, that has the ability to trigger webhook events and an equivalent of Zapier, such as n8n.io or Integromat, to create automated workflows.
Want a direct integration with Segment, or have an integration or feature idea?
Check out our product board! Perhaps, you'll notice that an integration with Segment is already in the works. 🎉 Feel free to upvote it, if you're interested or would like to take part in the beta!
You might also like:
- Why Orbit is Better Than Funnel for Developer Relations
- DevRel teams need tools and models created specifically for our discipline, and not just those adopted from other fields.
- Slack vs Discord vs Discourse: The best tool for your community
- An in-depth comparison of 3 top community platforms across dozens of factors.
- How we use Orbit to build Orbit
- A guide to how we use our product to build our community.

